![]()

![]()
Logging to elmah.io from Umbraco
elmah.io offer great support for all newer Umbraco versions. Umbraco has been in rapid development in the last few years, so the installation instructions are very different depending on which major version you are using. Make sure to select the right version below since newer versions of the Elmah.Io.Umbraco package don't work with older versions of Umbraco and vice versa.
Tip
To learn more about the elmah.io integration with Umbraco and an overall introduction to the included features, make sure to check out the elmah.io and Umbraco page.
During the installation steps described below, you will need your API key (Where is my API key?) and log ID (Where is my log ID?).
elmah.io integrates with Umbraco's Health Checks feature too. To learn more about how to set it up, visit Logging heartbeats from Umbraco.
Umbraco >= 9
Note
Umbraco 9 is targeting .NET 5.0 which is no longer supported by Microsoft. This is why we have chosen to support Umbraco 10 and up only.
To install elmah.io in your Umbraco >= v10 site, install the Elmah.Io.Umbraco NuGet package:
dotnet add package Elmah.Io.Umbraco
Install-Package Elmah.Io.Umbraco
<PackageReference Include="Elmah.Io.Umbraco" Version="5.*" />
paket add Elmah.Io.Umbraco
After installing the NuGet package add the following to the Startup.cs file:
public class Startup
{
    // ...

    public void ConfigureServices(IServiceCollection services)
    {
        services.AddElmahIo(options =>
        {
            options.ApiKey = "API_KEY";
            options.LogId = new Guid("LOG_ID");
        });
        // ...
    }

    public void Configure(IApplicationBuilder app, IWebHostEnvironment env)
    {
        // ...
        app.UseElmahIo();
        // ...
    }
}
Note
Make sure to call the UseElmahIo-method after installation of other pieces of middleware handling exceptions and auth (like UseDeveloperExceptionPage, UseExceptionHandler, UseAuthentication, and UseAuthorization), but before the call to UseUmbraco.
This will log all uncaught errors to elmah.io. If you want to hook into Umbraco's logging through Serilog, extend the configuration in the appsettings.json file with the following JSON:
{
  "Serilog": {
    ...
    "WriteTo": [
      {
        "Name": "ElmahIo",
        "Args": {
          "apiKey": "API_KEY",
          "logId": "LOG_ID"
        }
      }
    ]
  },
  ...
}
This will configure elmah.io's Serilog sink in Umbraco. You may experience logging not coming through when running locally. In this case, it might help to remove the WriteTo action from the appsettings.Development.json file.
Umbraco 8
To install elmah.io in your Umbraco v8 site, install the Elmah.Io.Umbraco v4 package:
dotnet add package Elmah.Io.Umbraco --version 4.2.21
Install-Package Elmah.Io.Umbraco -Version 4.2.21
<PackageReference Include="Elmah.Io.Umbraco" Version="4.2.21" />
paket add Elmah.Io.Umbraco --version 4.2.21
During the installation, you will be presented with a dialog asking for your API key and log ID. Hit F5 and watch messages start flowing into elmah.io.
Note
Unless serious security issues in the Elmah.Io.Umbraco v4 package are found, new features will be added to the v5 package only (supporting Umbraco 10 and newer).
Configuration
If you are running on the default Umbraco template, all necessary configuration is added during the installation of the Elmah.Io.Umbraco NuGet package. If your web.config file for some reason isn't updated during installation, you can configure elmah.io manually: Configure elmah.io manually. Likewise, the installer configures the elmah.io sink for Serilog in your config\serilog.user.config file.
Different environments
You may have different environments like Staging and Production. At least you have two: Localhost and Production. If you want to log to different error logs depending on the current environment, check out Use multiple logs for different environments. Web.config transformations work on the Web.config file only but you may have other config files that need transformation as well. In terms of elmah.io, the serilog.user.config file also includes elmah.io configuration that you may want to disable on localhost and include on production. If you are running on Umbraco Cloud this is natively supported as explained here: Config Transforms. Even in self-hosted environments, you can achieve something similar using the SlowCheetah extension. Check out this question on Our for details: Deploying different umbracoSettings.config for different environments.
Umbraco 7
We still support Umbraco 7 through the Elmah.Io.Umbraco package version 3.2.35:
dotnet add package Elmah.Io.Umbraco --version 3.2.35
Install-Package Elmah.Io.Umbraco -Version 3.2.35
<PackageReference Include="Elmah.Io.Umbraco" Version="3.2.35" />
paket add Elmah.Io.Umbraco --version 3.2.35
Note
New features will be added to the updated package for Umbraco 10 and newer only.
Umbraco Cloud
When using Umbraco Cloud, you may not have a local clone of the source code. To install elmah.io on Umbraco Cloud, follow these steps:
-
Clone your Umbraco Cloud project to a local folder as explained here: Working with a Local Clone.
-
Where you need to install and configure the
Elmah.Io.Umbracopackage depends on the Umbraco major version you are running on Umbraco Cloud. For Umbraco 7-8, all changes should be made in the*.Webproject only and all commits from within that folder as well. Don't commit and push anything in the root folder. For Umbraco versions above 8, all changes should be made in thesrc\UmbracoProjectfolder. -
Follow the installation steps for your Umbraco version as specified in the beginning of this document.
-
Commit and push all changes to the git repository. This will add elmah.io logging to your remote Umbraco Cloud project.
In case you want logging to different elmah.io logs from each Umbraco Cloud environment, please check out Umbraco's support for config transformations here: Config transforms.
Umbraco Uno
Warning
Umbraco Uno has been discontinued.
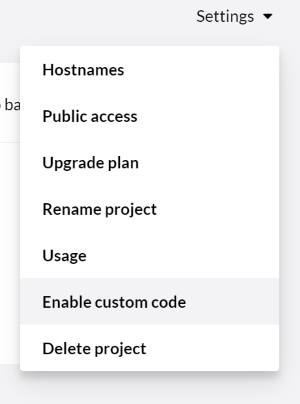
Installing elmah.io in Umbraco Uno follows the process of installing it onto Umbraco Cloud. To modify code and configuration in Uno you will need a Umbraco Uno Standard plan or higher. Also, you need to enable Custom Code to clone the code locally. This can be done from Uno by clicking the Enable custom code button:
After enabling Custom Code you can create a Development environment and follow the steps in the Umbraco Cloud documentation.
This article was brought to you by the elmah.io team. elmah.io is the best error management system for .NET web applications. We monitor your website, alert you when errors start happening, and help you fix errors fast.
See how we can help you monitor your website for crashes Monitor your website